
How to Post a Trade Ad on MEXC P2P (Website)

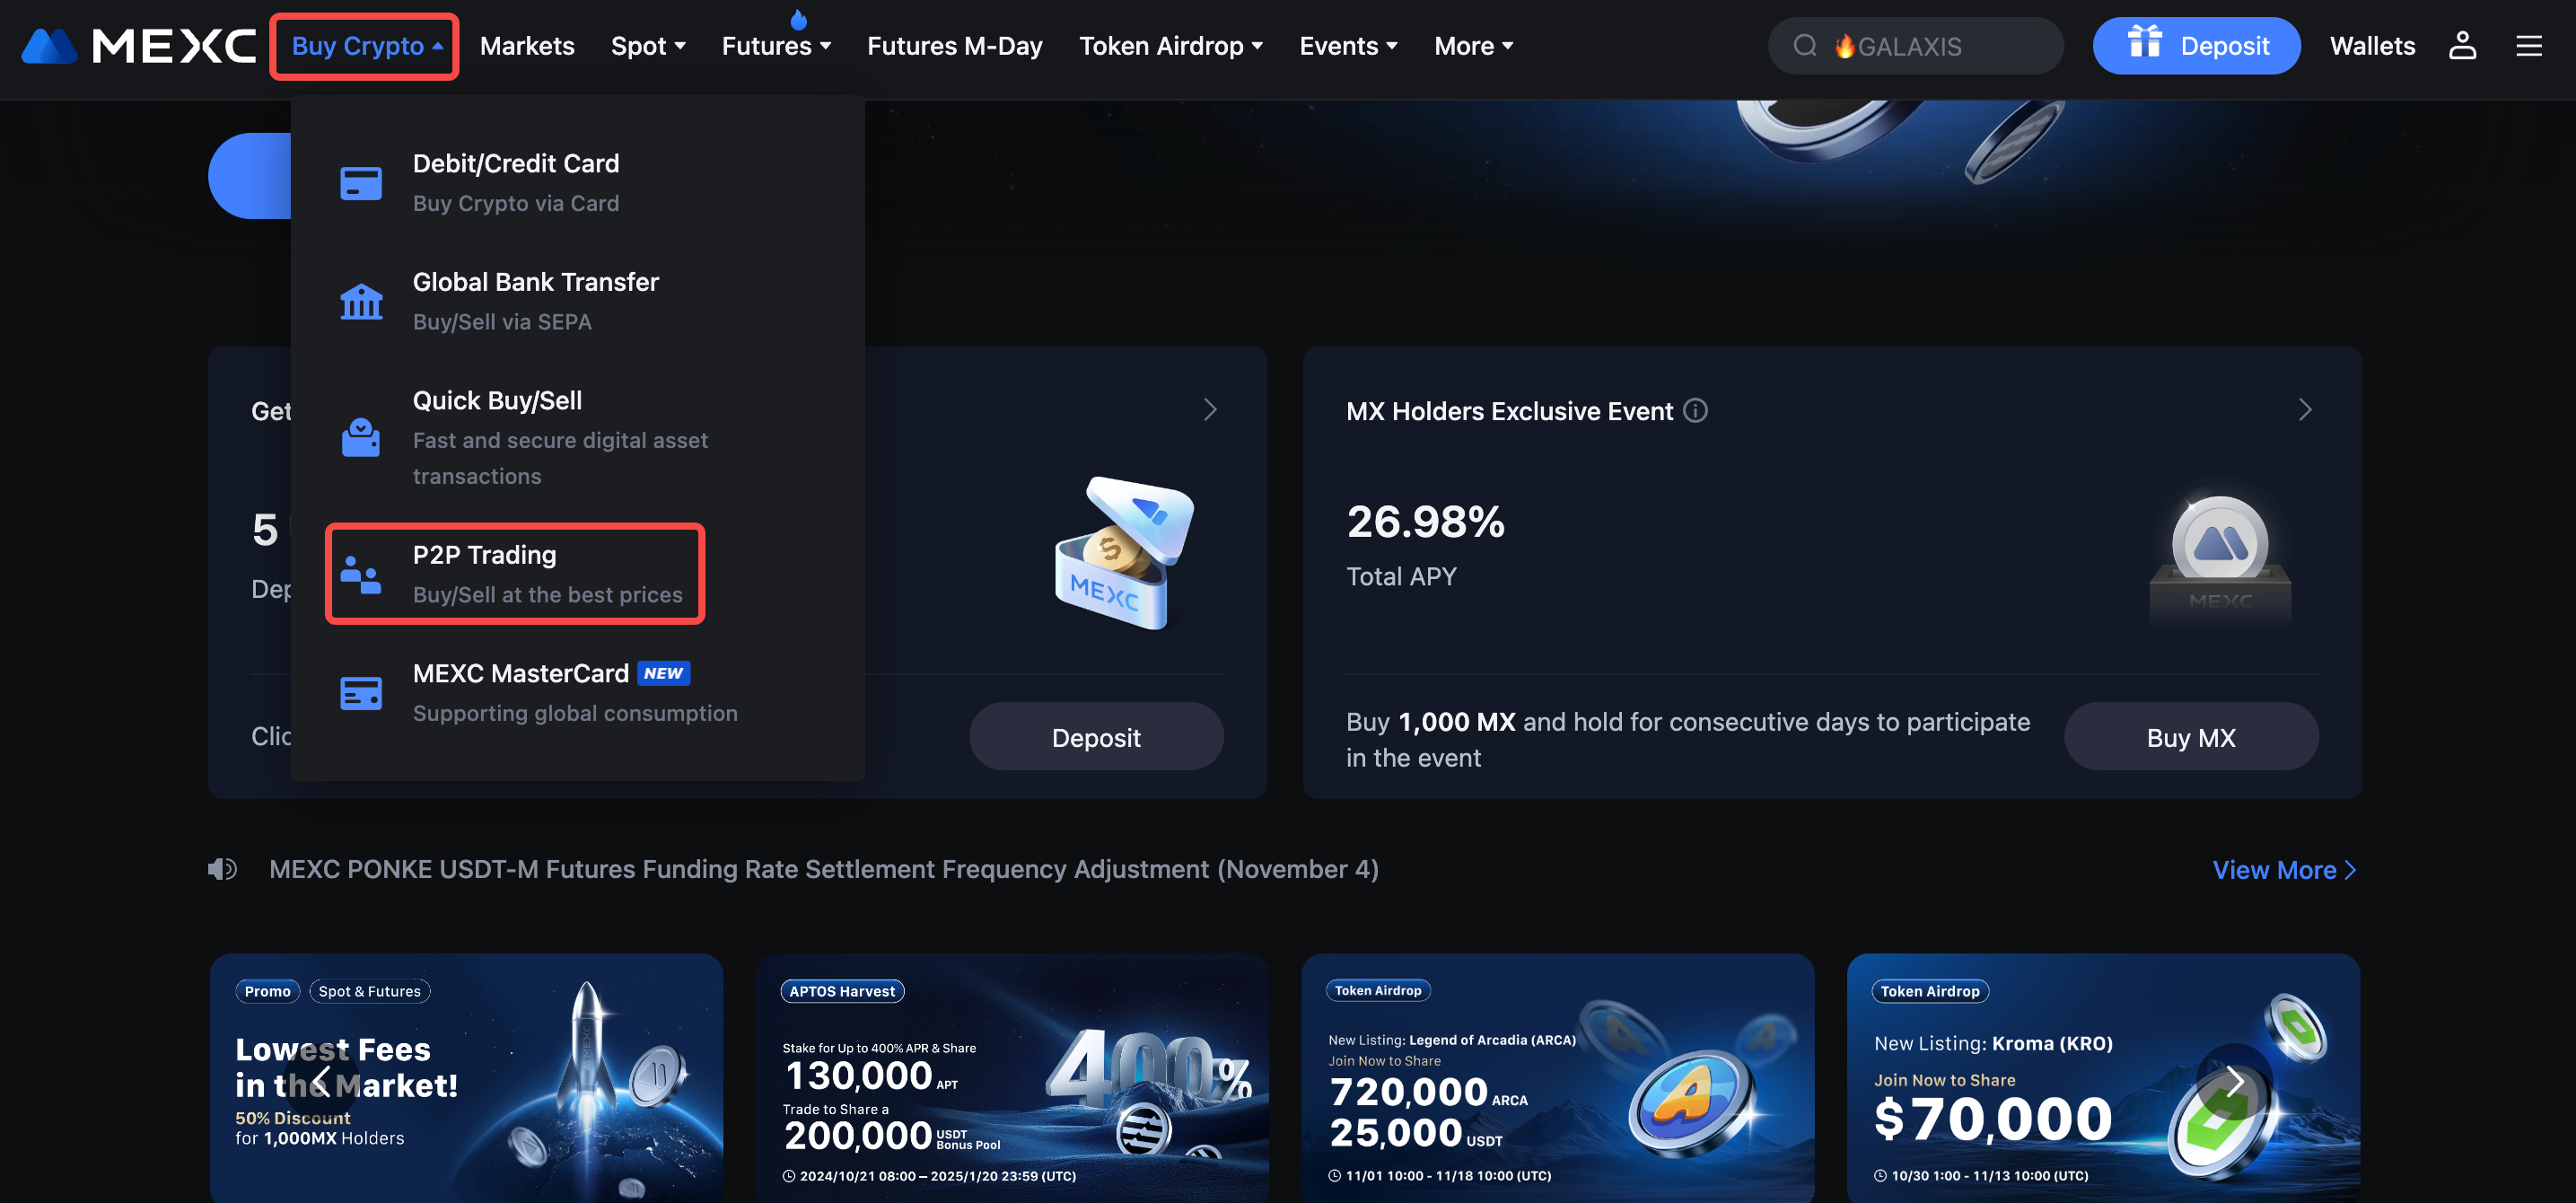
Open the MEXC official homepage, go to the top navigation bar, select [Buy Crypto], and click [P2P Trading] to enter the P2P trading page.
1. Accessing the Ad Posting Page
On MEXC, you can post advertisements either as a verified merchant or as a standard user.
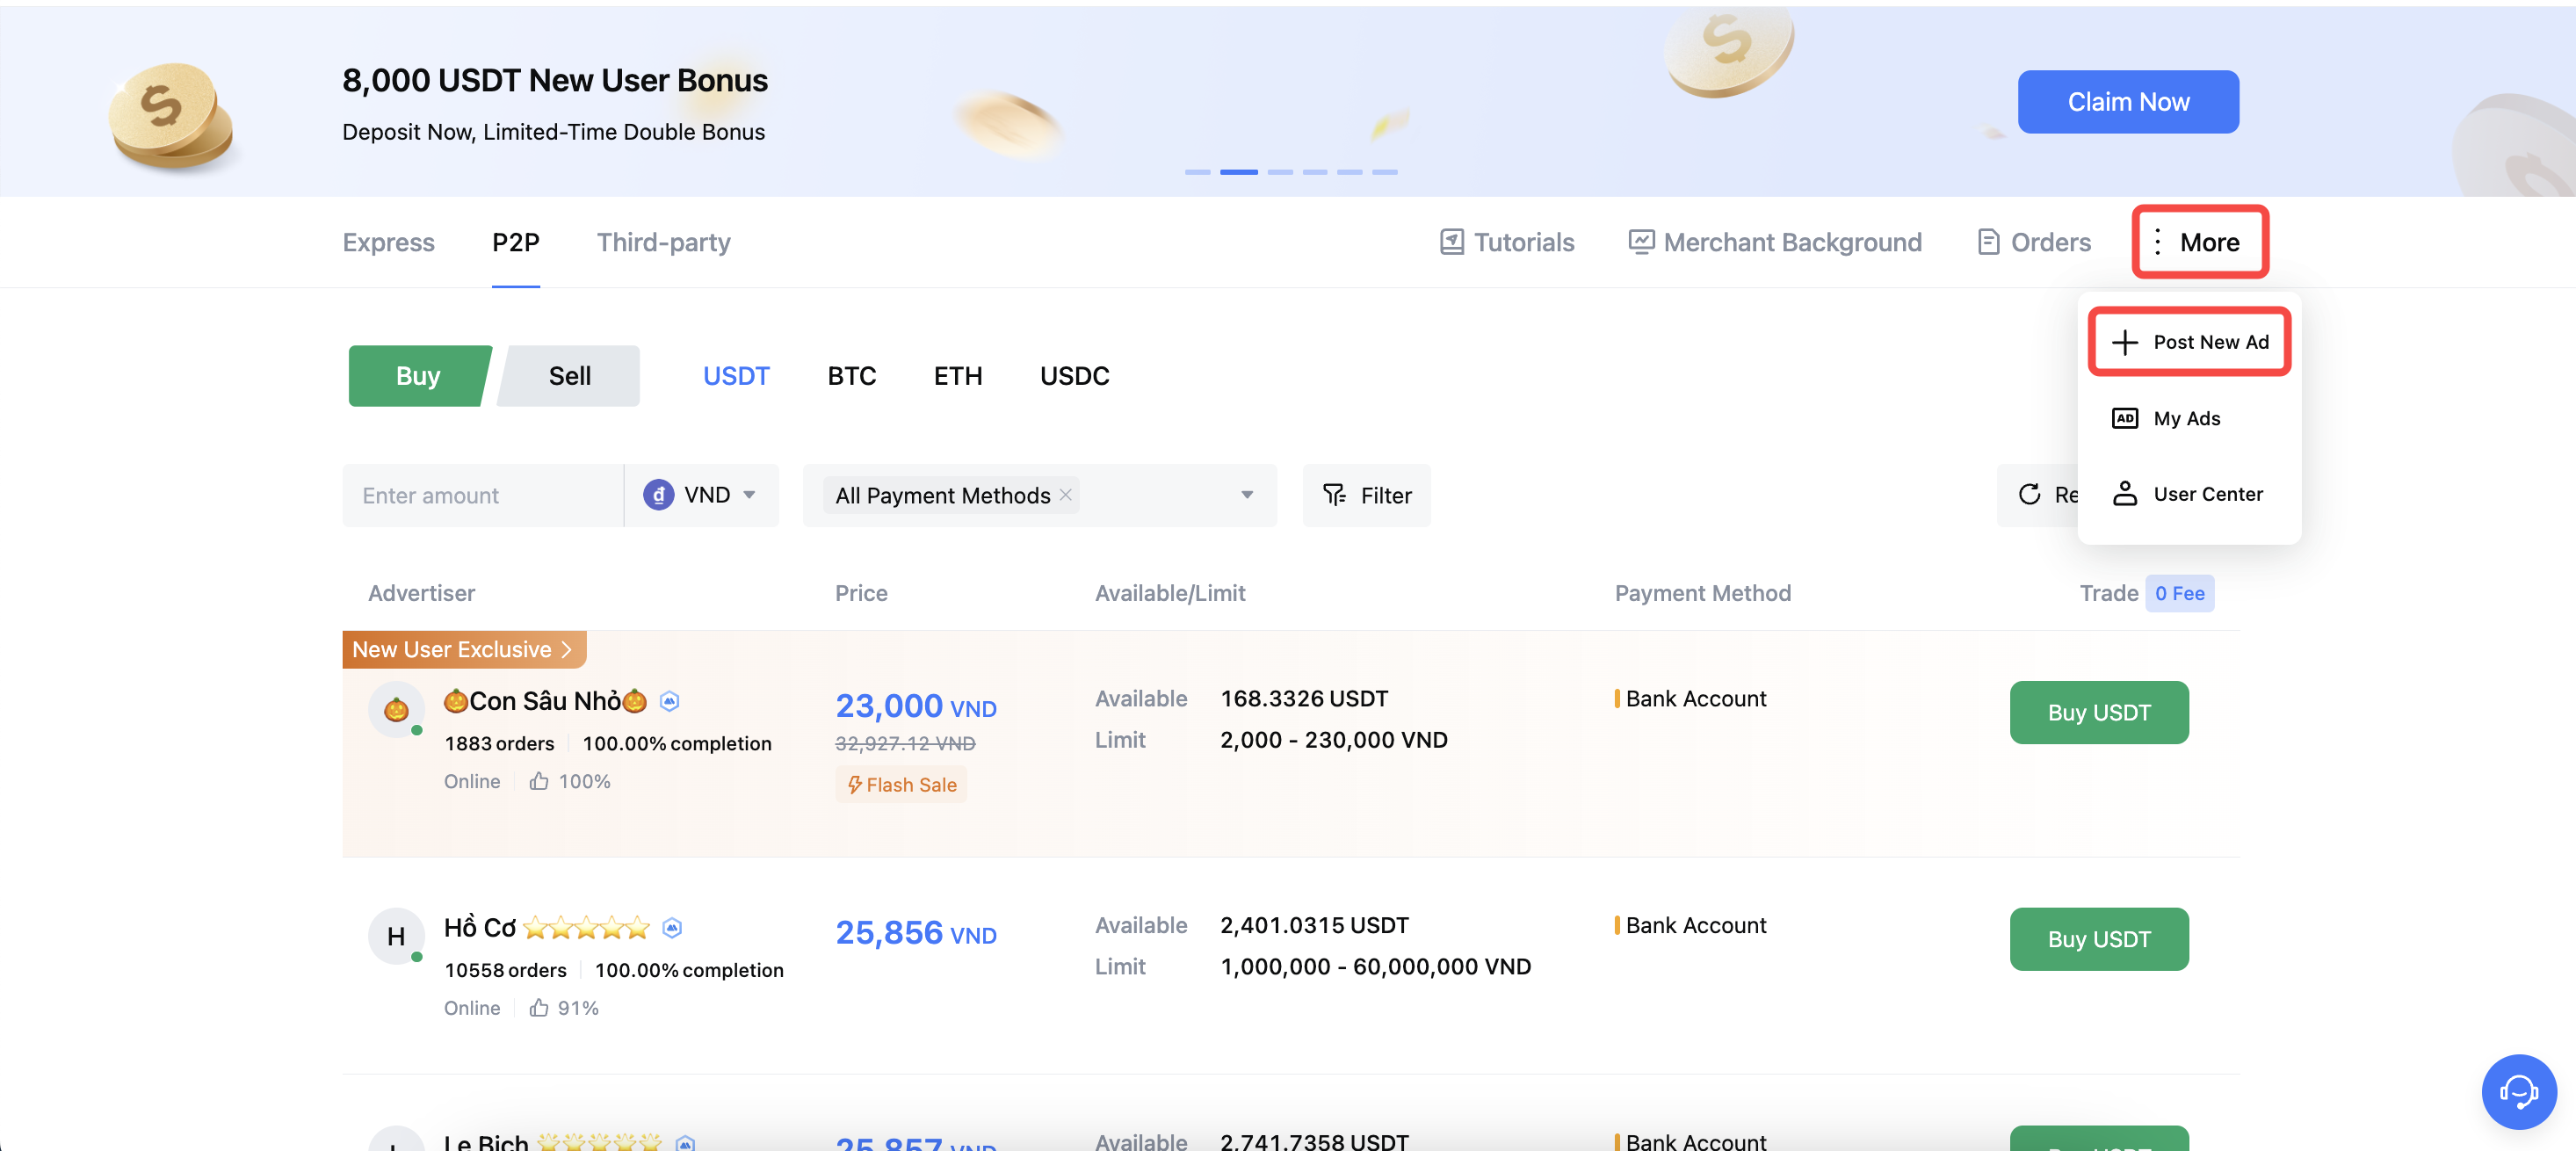
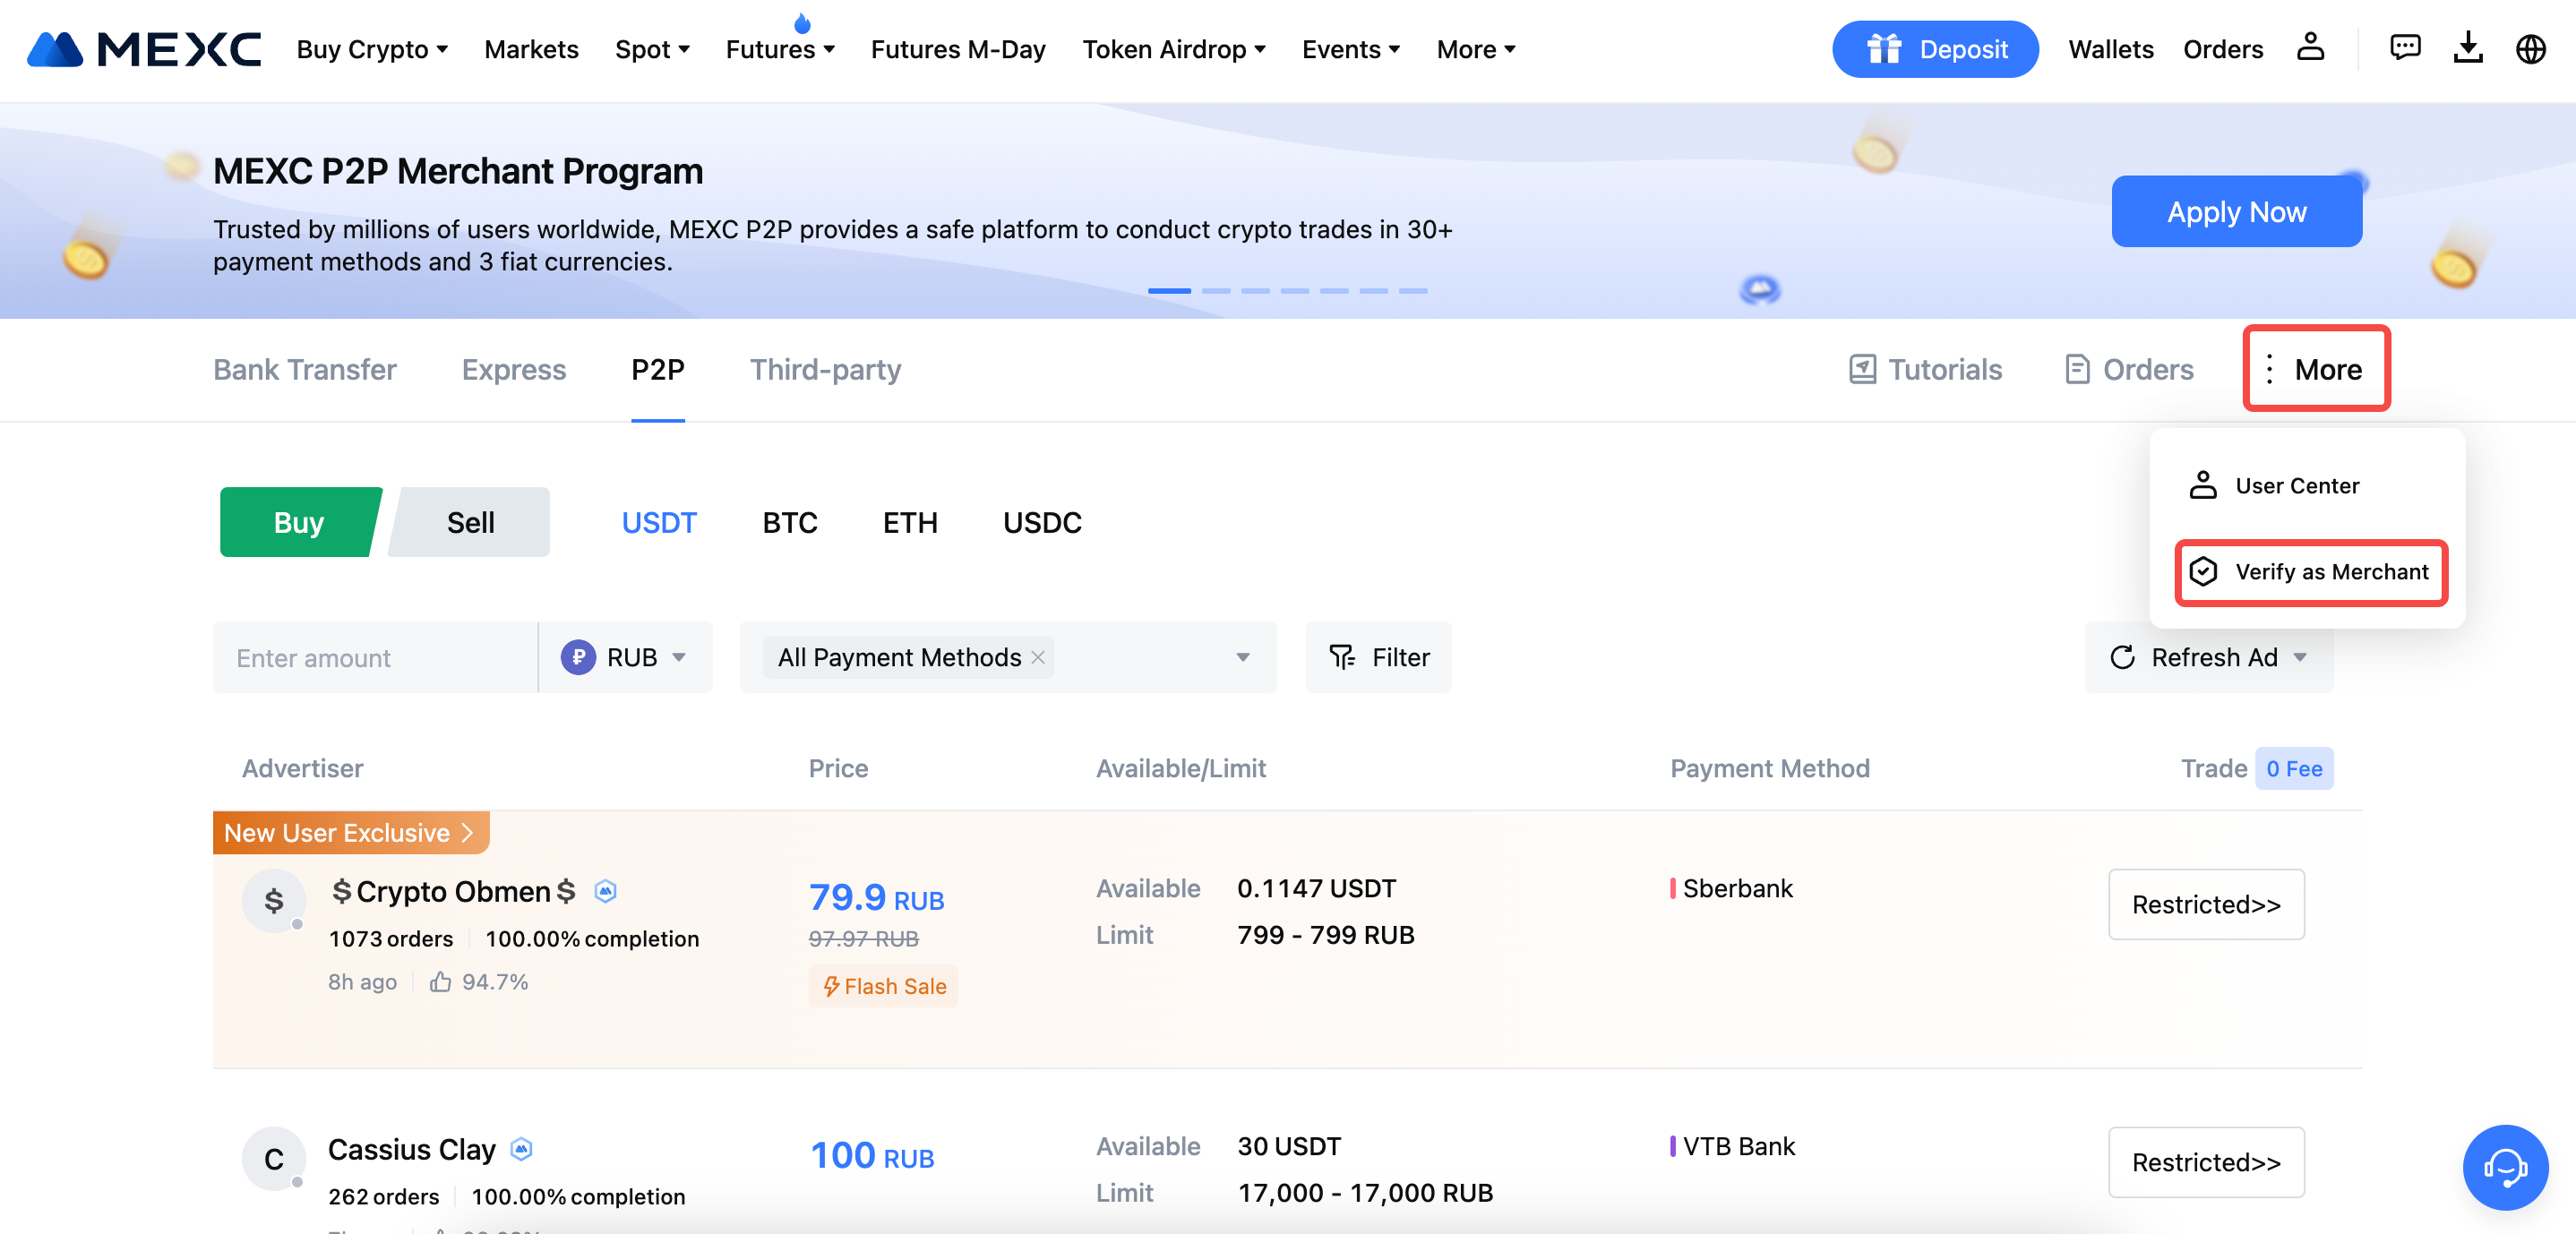
If you are posting an ad as an individual, you can go to the P2P trading page, click [More], and select [Post New Ad] to create an ad.
If you are posting an ad as a verified merchant, you can go to the P2P trading page, click [More], and select [Post New Ad] to create an ad.
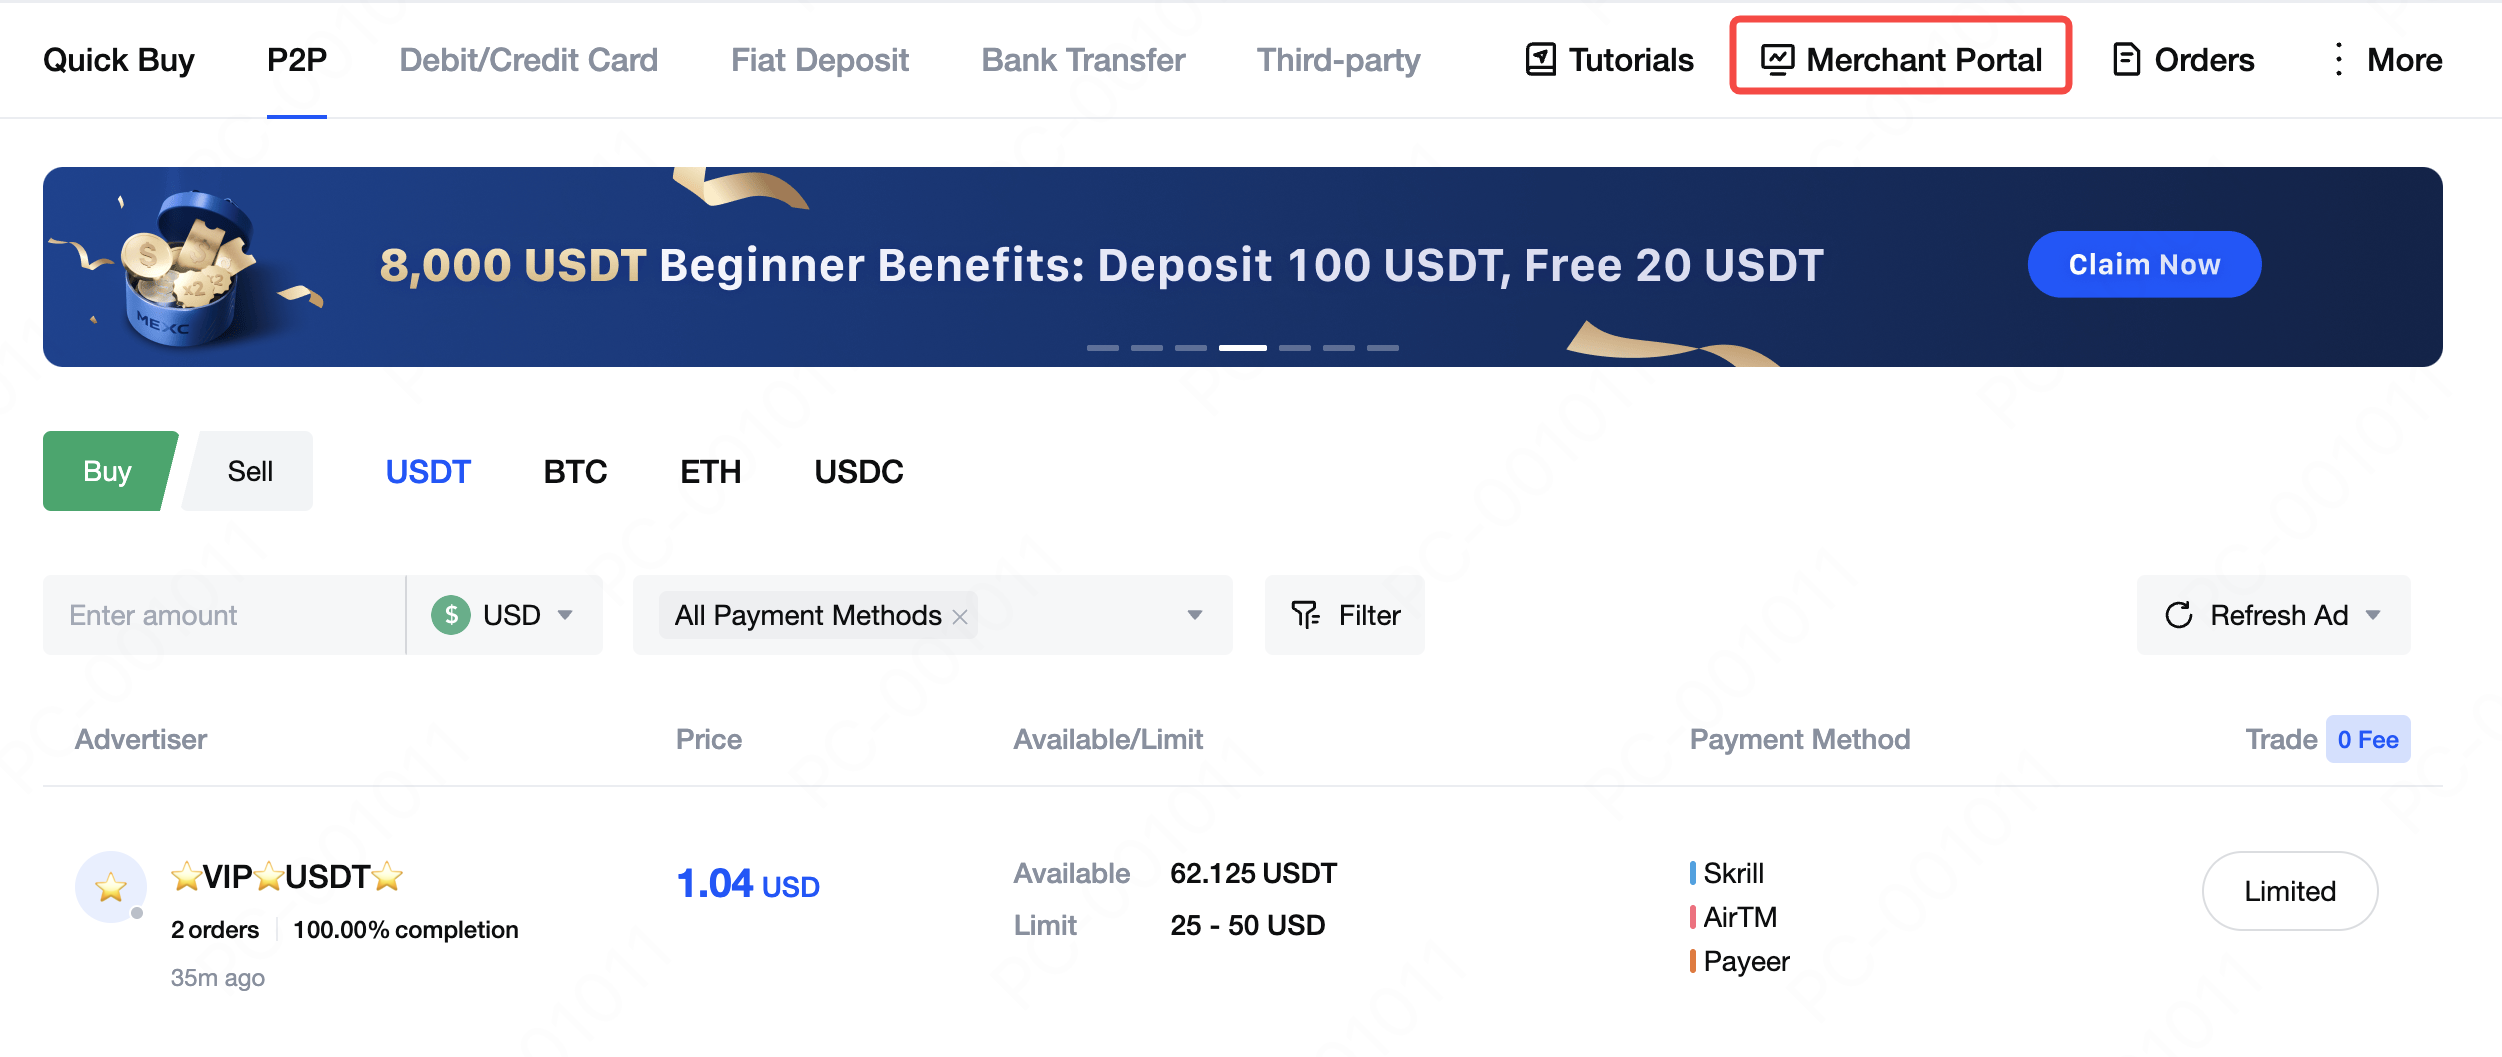
Alternatively, you can select [Merchant Portal].
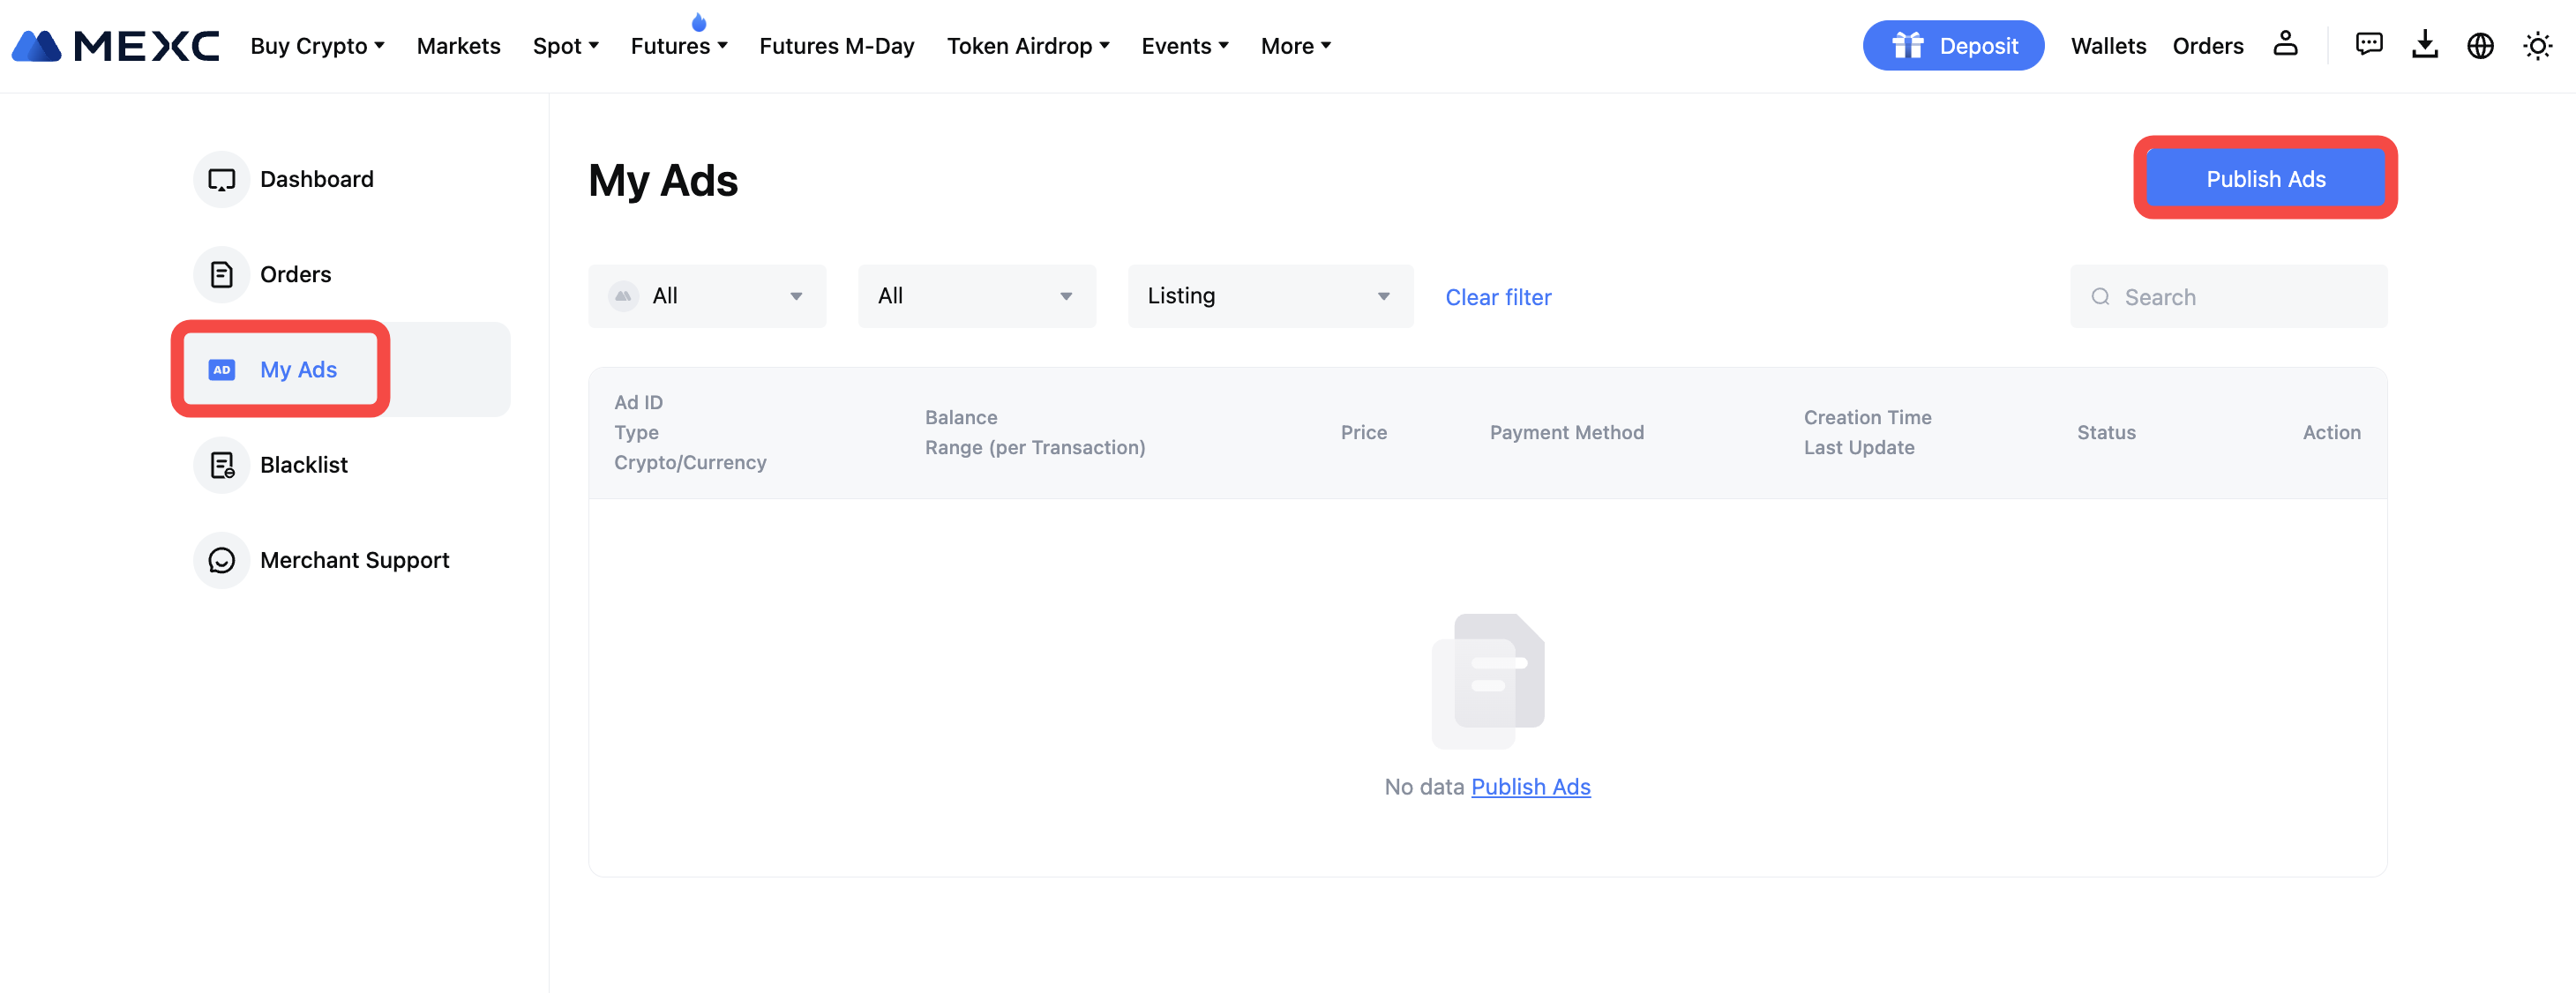
In the "My Ads" section within the Merchant Portal, click [Publish Ads] to create a new ad.
2. Becoming a Verified Merchant
If you are not yet a verified merchant on MEXC, go to the P2P trading page, click on [More] in the upper right corner, and select [Apply as Merchant].
Follow the on-screen instructions to complete SMS verification, email verification, and advanced KYC verification. Additionally, in some markets, you may also be required to freeze a security deposit to complete the verification process. Click [Submit Application]. MEXC P2P staff will review your application within 7 business days.
As a verified merchant, you can enjoy more benefits, including dedicated customer support, a special merchant badge, priority order processing, and access to exclusive merchant events. For detailed information on how to become a verified merchant and the advantages of being one, you can also read "MEXC is now Recruiting P2P Merchants!".
3. Posting Ads
3.1 Ad posting requirements
To ensure a secure trading environment, MEXC applies different ad posting requirements based on the user's status and region.
- Standard users must meet specific criteria, including advanced KYC verification, linking mobile devices and email to their account, and may be subject to conditions such as account age, number of completed P2P orders, net trading volume, and order completion rate.
- Verified merchants enjoy higher limits and fewer restrictions, but some markets may also require a frozen security deposit as part of the verification process.
You can view the full list of ad posting requirements by market here:
MEXC P2P Ad Posting Requirements
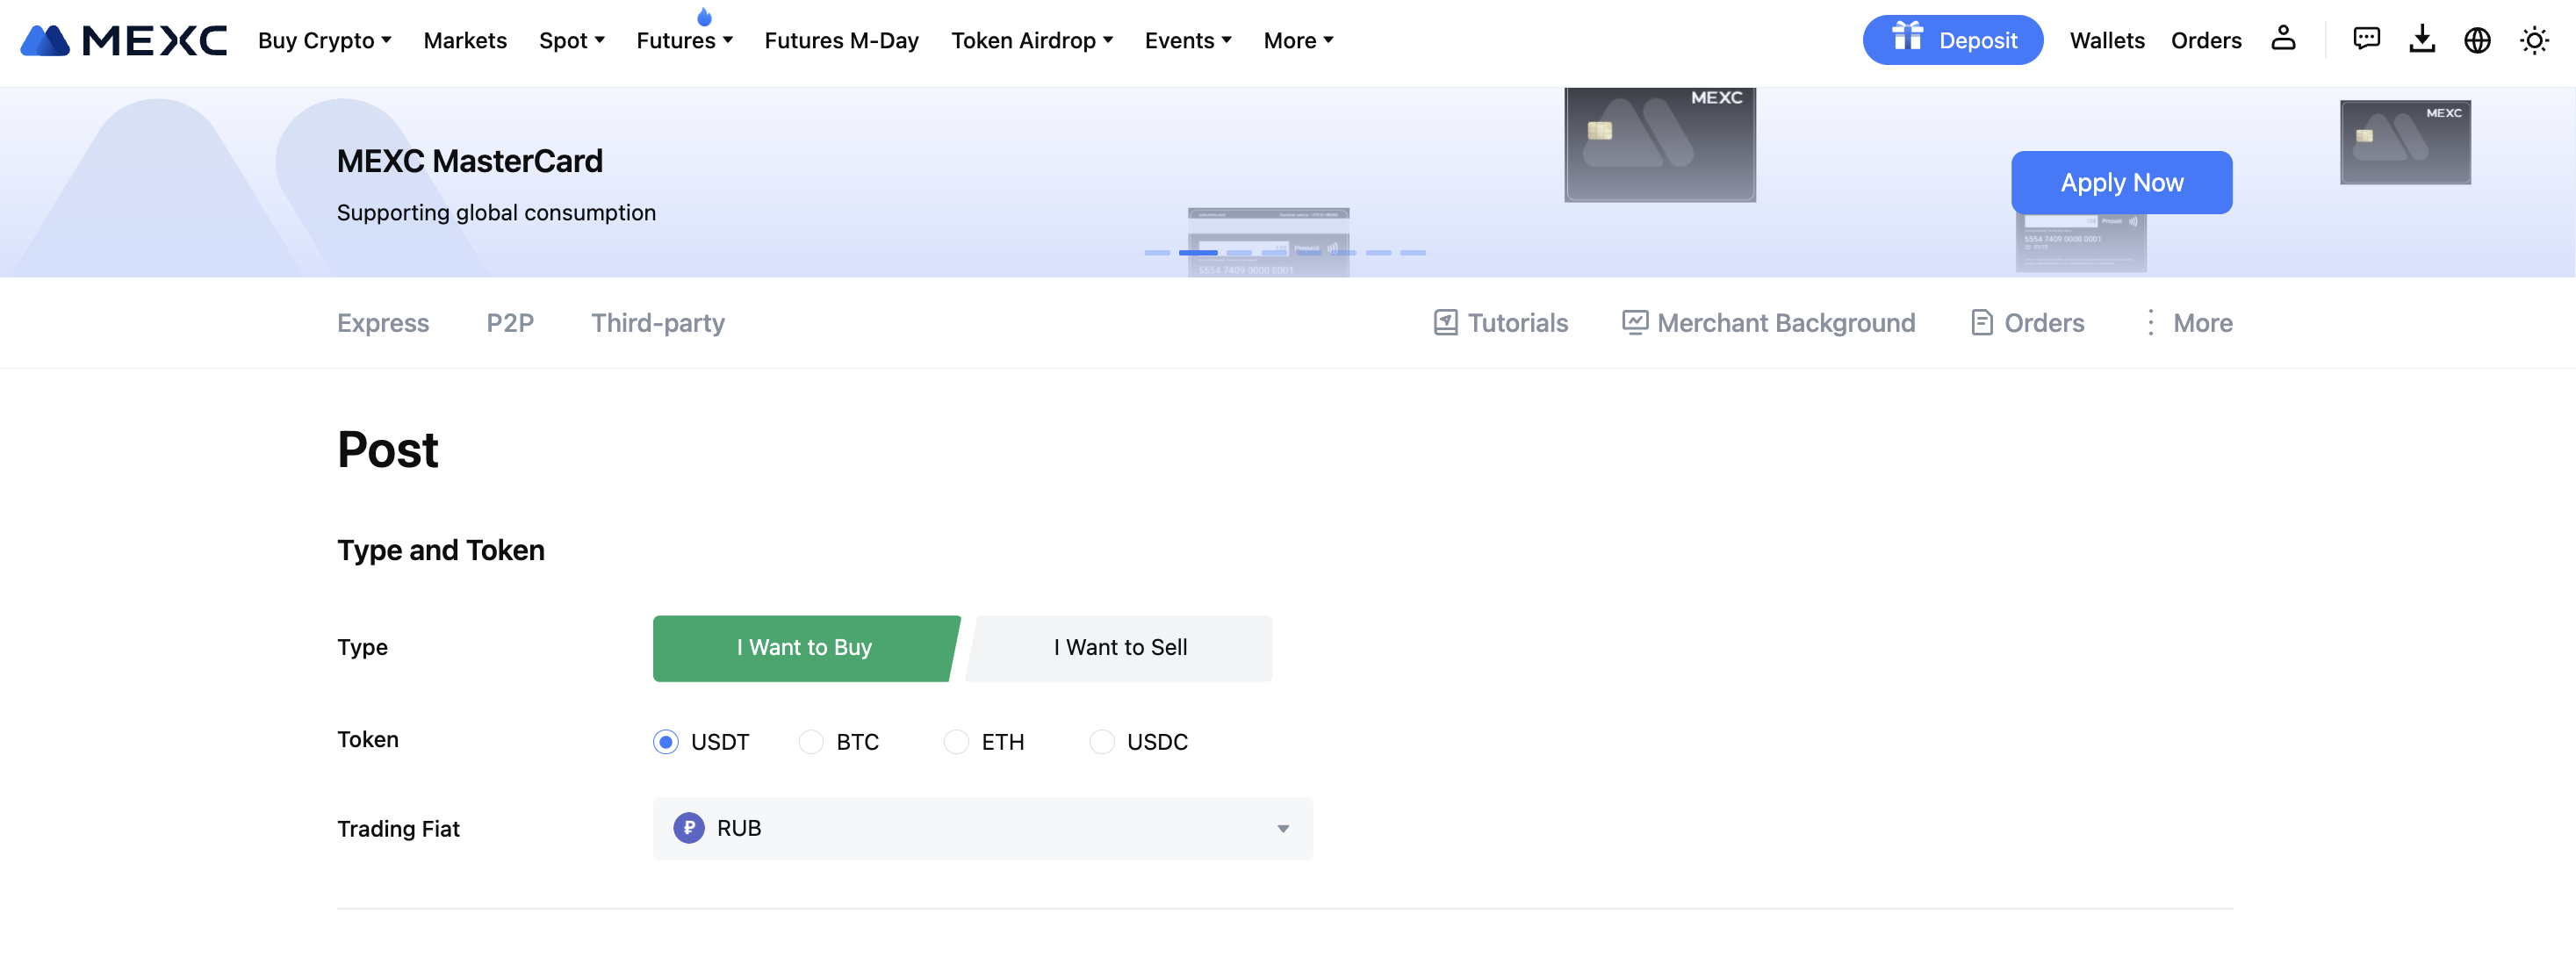
3.2 Set Type and Token
Choose [I Want to Buy] or [I Want to Sell] for the ad type and select the token and trading fiat.
Note: If you select the [I Want to Sell], you must have a sufficient balance in your fiat account to successfully post the ad.
Additionally, sell ads are subject to minimum amount requirements, which may vary by market and fiat currency. You can find the full list of minimum amounts here.
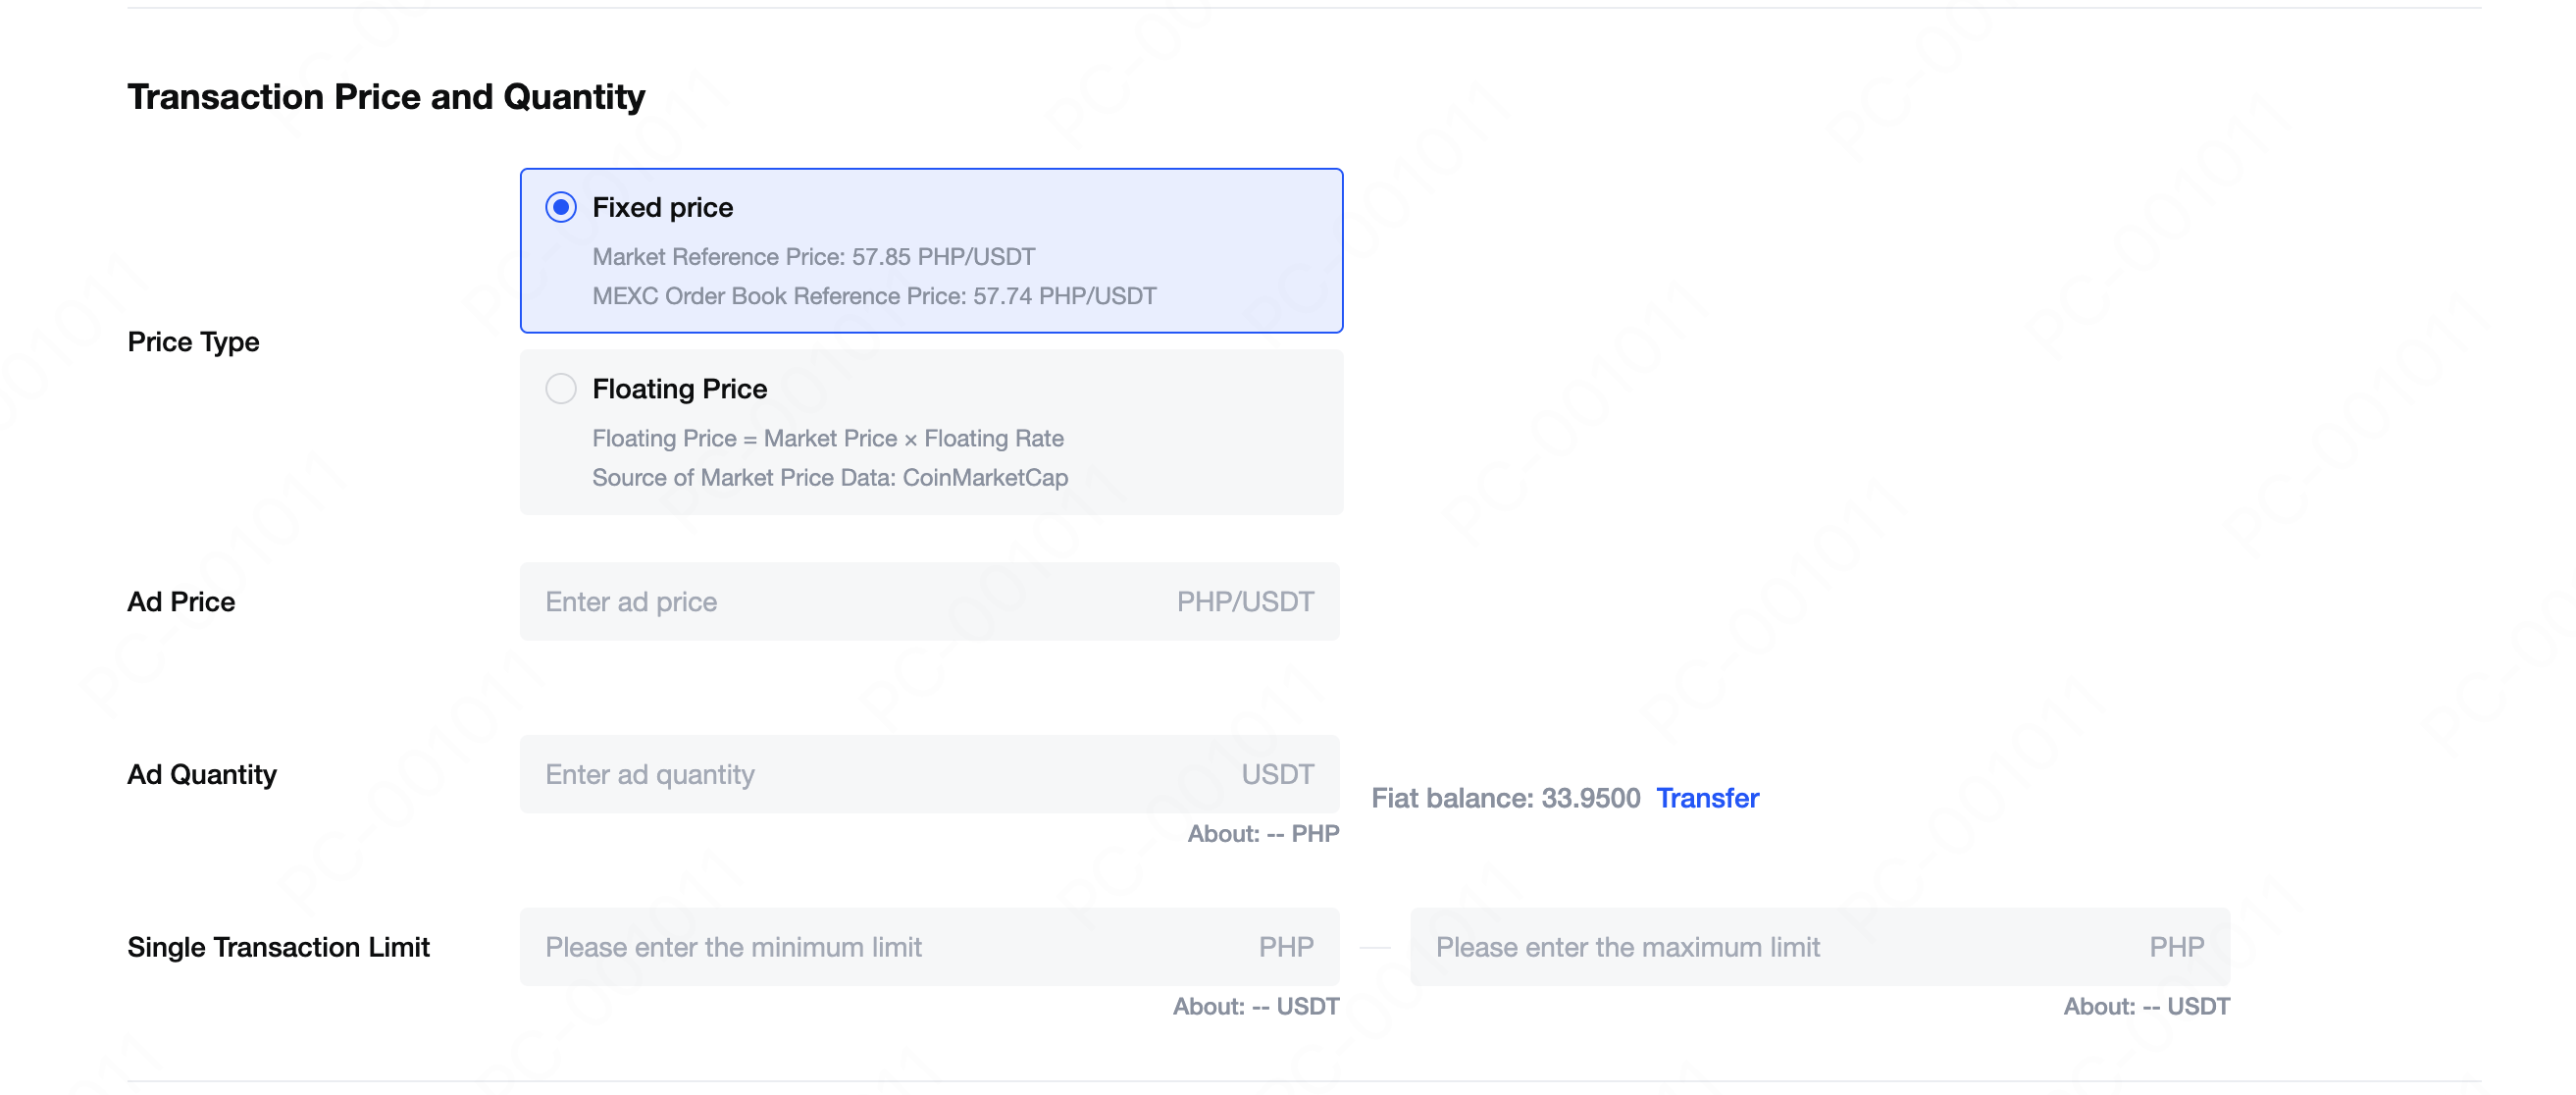
3.3 Set Price and Quantity
Currently, MEXC supports Fixed-price and Floating Price ads for selling. Set the price, quantity, and the single transaction limit.
3.4 Set Payment Methods
You can add up to 10 payment methods. You may set a time limit for each payment method. If the buyer does not complete the transaction within the specified time, the trade will be canceled.

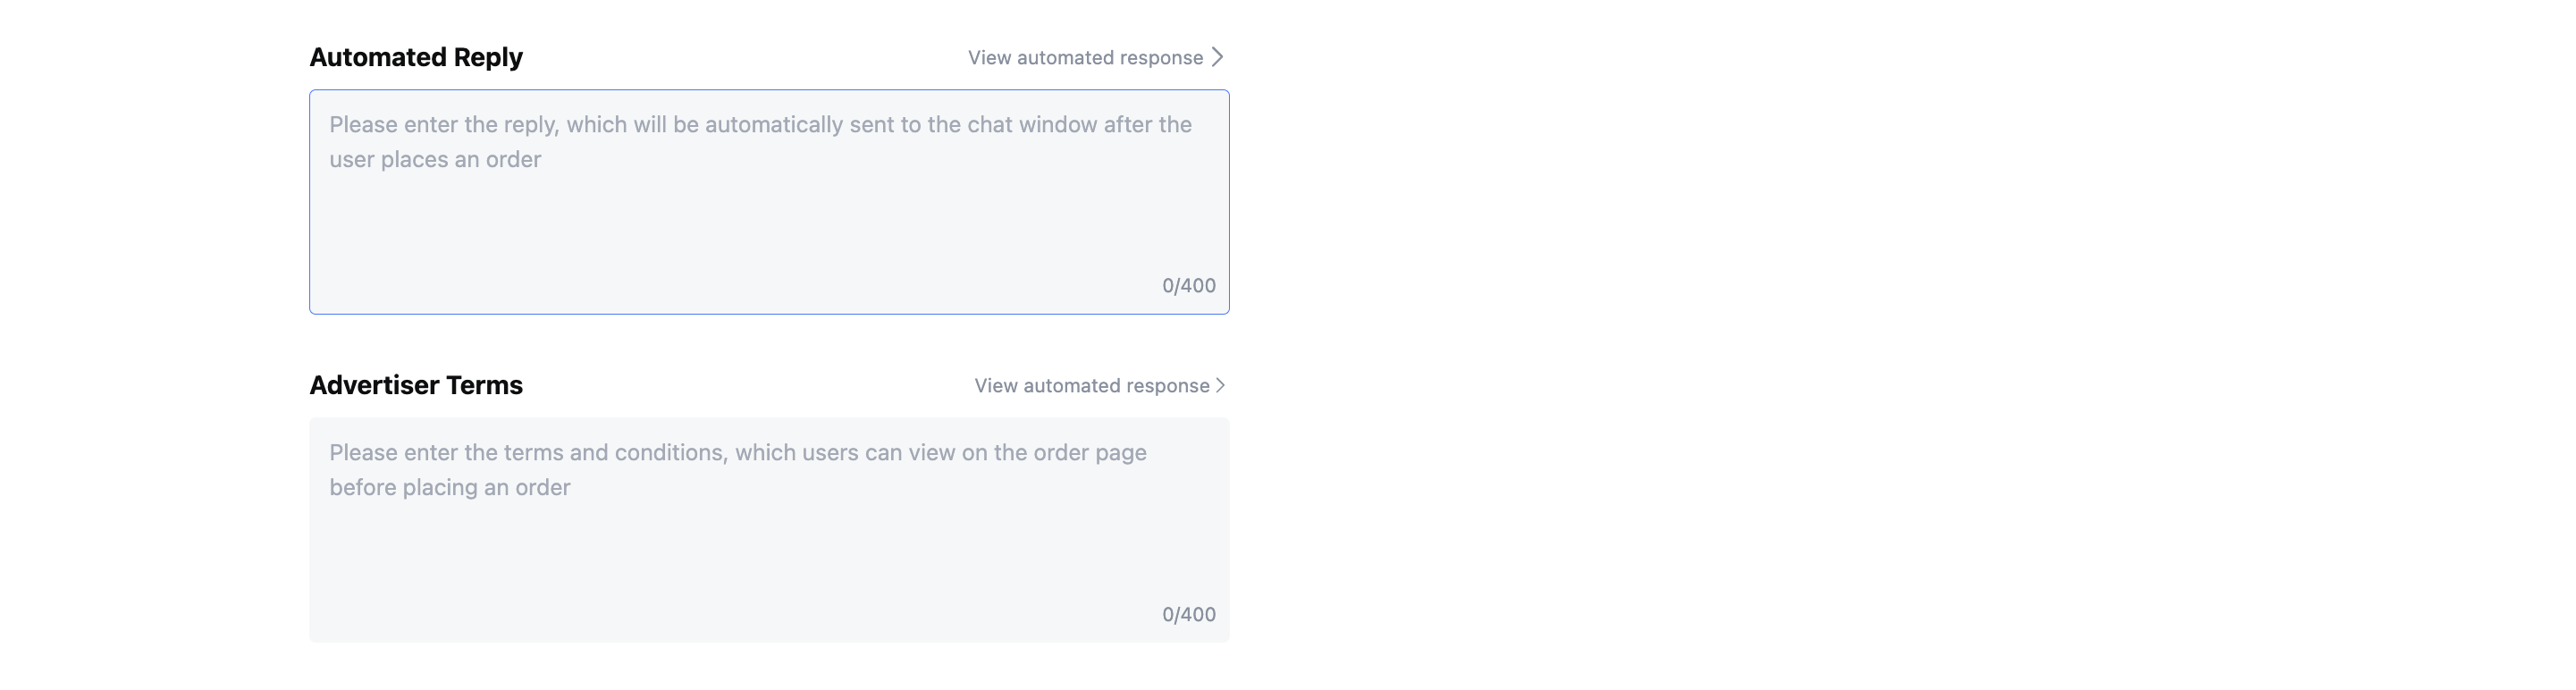
3.5 Add Notes and Terms
Enter an automatic reply message, which will be sent to the chat window when a user places an order. You can also specify terms and conditions for the ad, which users can view on the order page before placing an order.
Important Guidelines:
The content of the automated reply and advertiser terms must not contradict MEXC’s P2P Service Agreement.
- Charging any additional fees beyond the listed trade amount is strictly prohibited.
- Do not include third-party links or personal contact information such as phone numbers, WhatsApp, Telegram, or any external messaging platforms.
- Ensure your terms are clear, professional, and aligned with MEXC's compliance standards to maintain a smooth and secure trading experience.
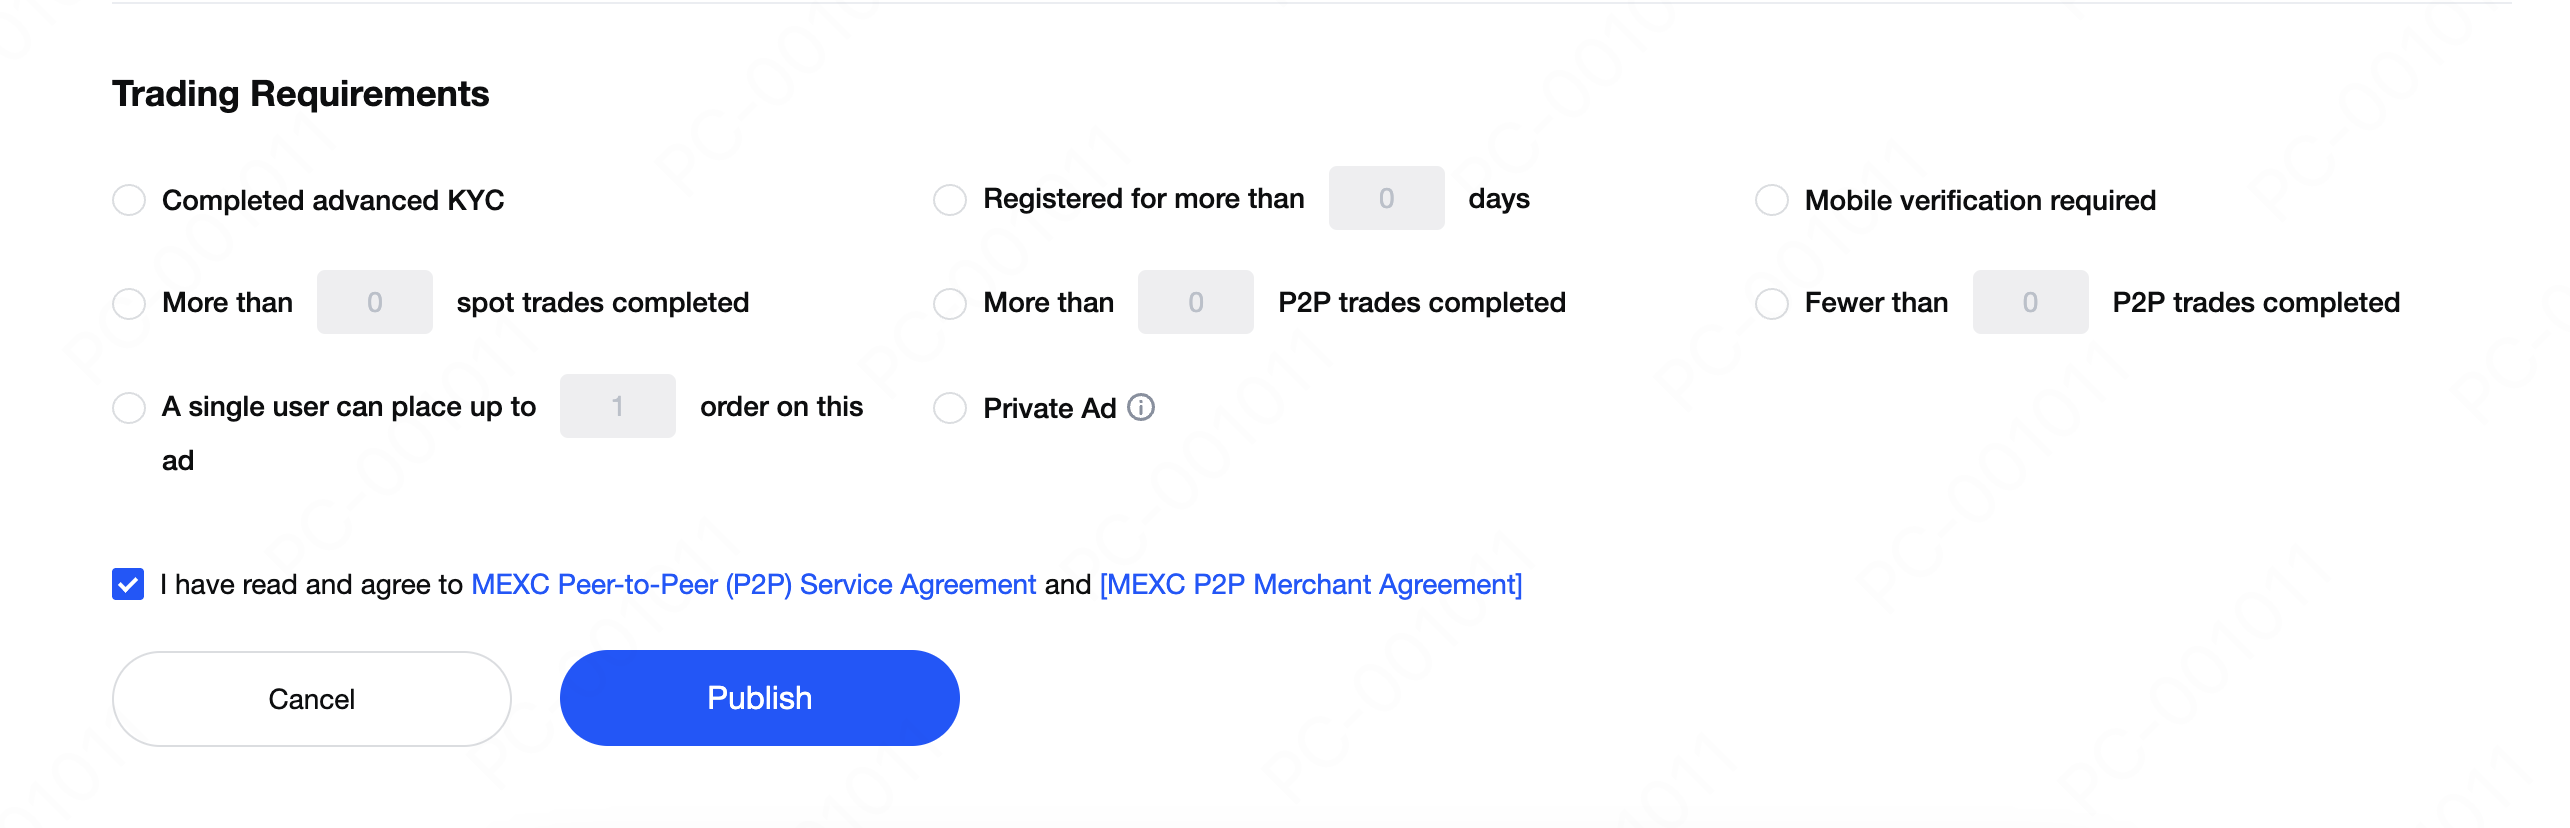
3.6 Set Trade Requirements
You can specify requirements for your ad, such as advanced KYC completion, account age, and mobile verification completion. Users who do not meet these requirements will not be able to place an order.
Tip: The stricter your trade requirements, the fewer potential buyers or sellers will be able to engage with your ad. Use filters strategically to balance security with order volume.
After reviewing and agreeing to the relevant terms, click [Publish] to post your ad.
4. Viewing and Editing Published Ads
In the "My Ads" section, you can check the status of your published ads. Once posted, you can edit, delist, delete, or share your ad.
Note: Once an ad is deleted, it can no longer be edited.
